

Egg Recipe Chinese

Egg Recipe Chinese
Egg Recipe Chinese
Nutrient-dense and also high in healthy protein, eggs play a crucial function in lots of foods, consisting of Chinese. Rushed, hard-boiled, or blended in a soup, egg celebrity in a variety of Chinese dishes, like Egg Foo Yung, tea eggs or egg decrease soup, that are very easy as well as incredibly savory. Our collection includes several of the favored egg-based Chinese recipes, from keys to sides.
Easy Chinese Egg Drop Soup
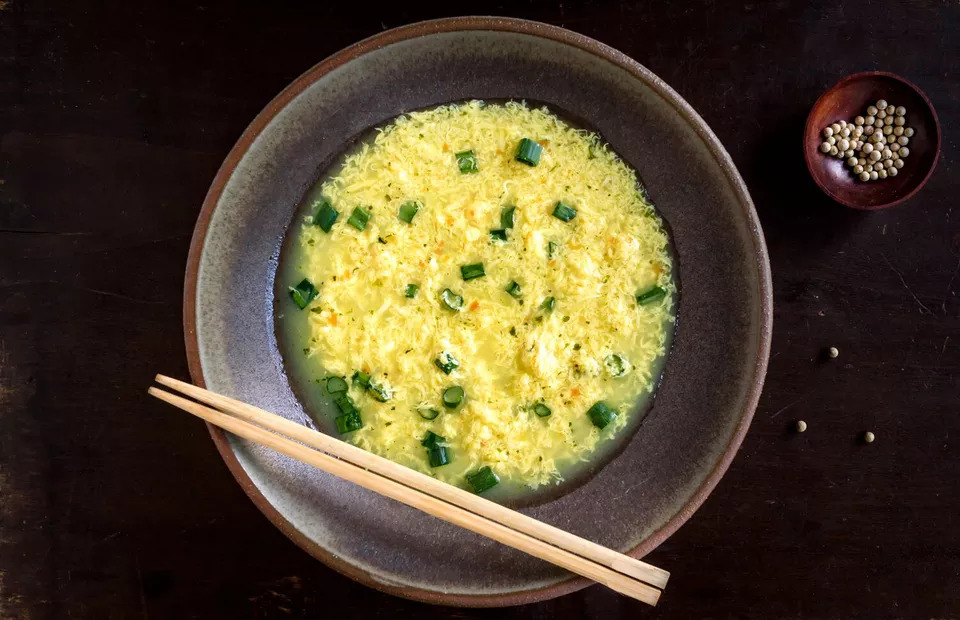
Easy-Chinese-Egg-Drop-Soup
Total:
20 mins Prep: 5 mins Cook:15 mins Yield:3-4 Cups (3-4 Servings)
Ingredients
4 cups chicken broth (or stock)
2 large eggs (lightly beaten)
1 to 2 spring onions (finely chopped)
1/4 teaspoon white pepper
Salt (to taste)
Optional: few drops sesame oil
Directions
Egg Drop Soup Ingredients.
In a wok or saucepan, bring the 4 cups of chicken broth or stock to a boil.
Very slowly, pour in the lightly beaten eggs in a steady stream. To make shreds, stir the egg rapidly in a clockwise direction for 1 minute. To make thin streams or ribbons, gently stir the eggs in a clockwise direction until they form.
Season the soup with white pepper, salt, and sesame oil.
Pour into bowls and garnish with spring onion.
Serve and enjoy!
Notes
How to Thicken the Soup: In a small bowl or measuring cup, mix together 1 to 2 tablespoons of cornflour/cornstarch or potato starch with 1/2 cup of water until smooth. Slowly stir the paste into the chicken stock before adding the eggs. Proceed with the rest of the directions.
Egg Foo Yung With Gravy
Egg Foo Yung With Gravy
Total: 30 mins Prep: 15 mins Cook: 15 mins Yield: 1 omelet (3 to 4 servings)
Ingredients
For the Sauce
1/2 cup low-sodium chicken broth
1 tablespoon light soy sauce
1 tablespoon Chinese rice wine (or dry sherry)
Dash sesame oil
Optional: freshly ground black or white pepper (to taste)
1 teaspoon cornstarch dissolved in 4 teaspoons water
For the Egg Foo Young
6 mushrooms
1/2 cup mung bean sprouts
1/4 to 1/2 cup Napa cabbage (shredded)
3 Chinese sausages (lap Cheong)
5 large eggs
1 teaspoon salt
Freshly ground black pepper (to taste)
2 to 3 teaspoons Chinese rice wine (or dry sherry)
3 tablespoons canola (or corn or peanut oil)
1/4 cup onion (peeled and chopped)
2 green onions (chopped)
Directions
Note
while there are multiple steps to this egg foo yung recipe, it is broken down into workable steps to help you better plan for cooking.
Make the Sauce
Gather the ingredients. To make the egg foo yung sauce, bring the chicken broth to a boil over medium heat. Stir in the soy sauce, rice wine (or sherry), sesame oil, and pepper to taste. Turn up the heat slightly and add the dissolved cornstarch-water mixture, stirring quickly to thicken.
Move the saucepan to another burner and keep warm on low heat while preparing the egg foo yung omelet.
Make the Egg Foo Yung Omelet
Gather the ingredients. Wipe the mushrooms with a damp cloth, slice, and reserve.
Rinse the mung bean sprouts, shred the cabbage and reserve.
If desired, you can blanch the vegetables so they will be more tender—just be sure to drain them thoroughly.
Chop the sausage on the diagonal into 1/4-inch pieces and reserve.
In a medium bowl, lightly beat the eggs with the salt, freshly ground black pepper, and the rice wine or sherry and reserve.
Heat 1 tablespoon oil in a wok or frying pan over medium heat. When the oil is hot, add the onion and sausage. Stir fry for 2 minutes, then remove from the pan with a slotted spoon and reserve.
Add 1 more tablespoon of oil, and stir-fry the reserved mushrooms until they’re browned. Remove from the pan and reserve.
Add the cooked sausage, onion, and mushrooms to the reserved egg mixture, along with the mung bean sprouts and cabbage.
Add the remaining 1 tablespoon of oil to the pan. When the oil is hot, add the egg mixture. Cook until golden brown on the bottom.
Then turn over and cook the other side until golden brown.
Serve hot with the warmed sauce poured over the top.
Accompany with steamed rice, if desired, and more Asian vegetables like stir-fried pea pods.
Chinese Tea Eggs
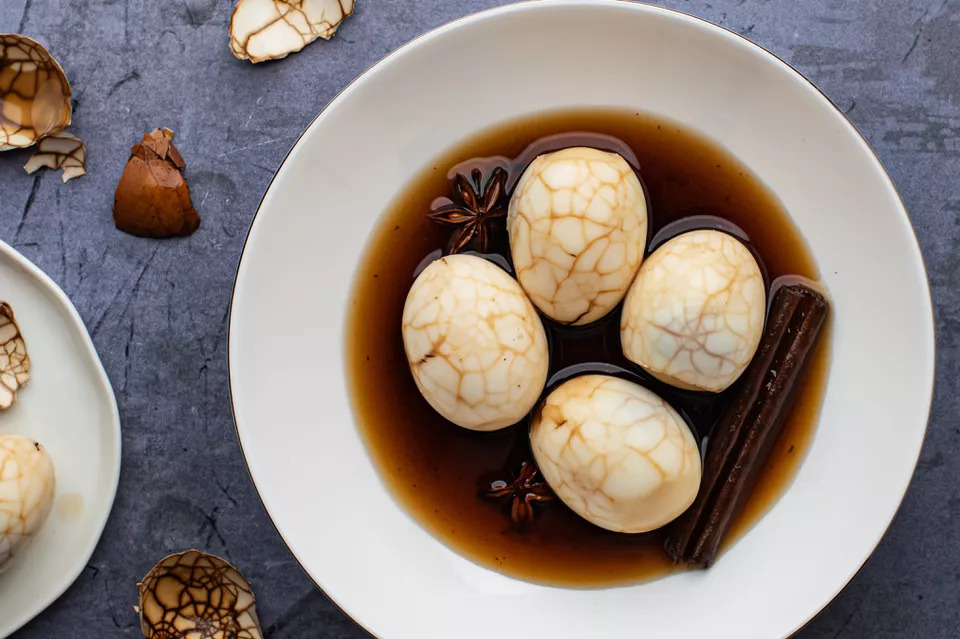
Chinese Tea Eggs
Total: 2 hrs 35 mins Prep: 5 mins Cook: 2 hrs 30 mins
Yield: 6 servings
Ingredients
6 eggs
3 1/2 cups cold water, or as needed
1 teaspoon salt
2 tablespoons soy sauce
1/2 cup brewed black tea
2-star anise (broken into individual pieces)
1 cinnamon stick
Directions
Gather the ingredients. Place the eggs in a saucepan with the water, making sure that there is at least 1/2-inch of water above the eggs. Cover and bring to a rolling boil.
Remove the saucepan from the element and let the eggs stand in the hot water for 15 to 20 minutes, until they are cooked. Remove the eggs and run them under cold running water to cool.
Tap the hard-boiled eggs gently with the back of a spoon, to make a series of cracks all over the eggshells, while making sure the shell remains intact. (If the shell does come off, don’t worry – it just means that egg will have a darker color than the others).
Bring the water in the pan back to a boil. Add the salt, soy sauce, brewed black tea, star anise pieces, and the cinnamon stick. Add the eggs. Simmer, stirring occasionally, for 2 hours.
Turn off the heat and let the eggs sit in the hot liquid until ready to serve.
Korean Steamed Egg (Gaeran Jim)
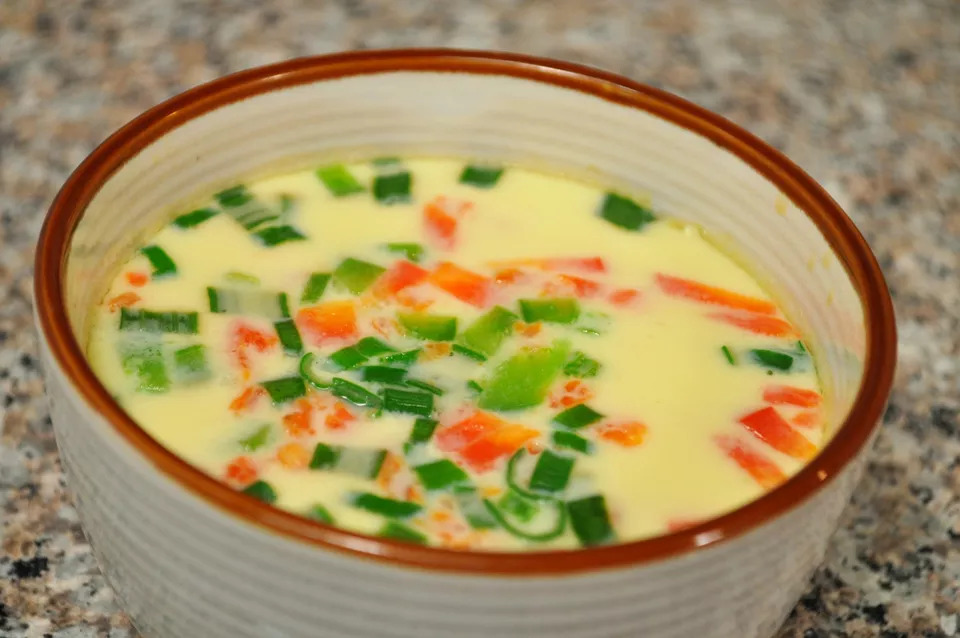
Korean Steamed Egg
Total: 12 mins Prep: 2 mins Cook: 10 mins Yield: 4 eggs (4 Servings)
Ingredients
4 eggs
3/4 cup water
2 teaspoons salt
1 scallion (chopped)
Directions
Gather the ingredients. In a heat-safe bowl (porcelain or stoneware work best), whisk eggs, water, salt, and scallions together until fully combined.
If using a microwave, cover the bowl with a plate and cook for 4 minutes.
If steaming on a stove, steam the bowl in a steamer for 10 minutes over medium-high heat. You can also just put the bowl in a large pot with a few inches of water at the bottom and steam for 15 minutes over low-medium heat. Serve and enjoy!
Recipe Variations
This Korean steamed egg recipe includes only scallions as the seasoning for the eggs. However, you can experiment with chili pepper flakes, sesame seeds, and vegetables such as mushrooms, sweet bell peppers, zucchini, and sweet corn while sticking reasonably closely with Korean tradition.
You also can consider substituting broth (beef broth, chicken broth, seafood broth, or vegetable broth) for the water in this recipe, which will give the eggs a different, robust flavor.
Scrambled Eggs With Shrimp
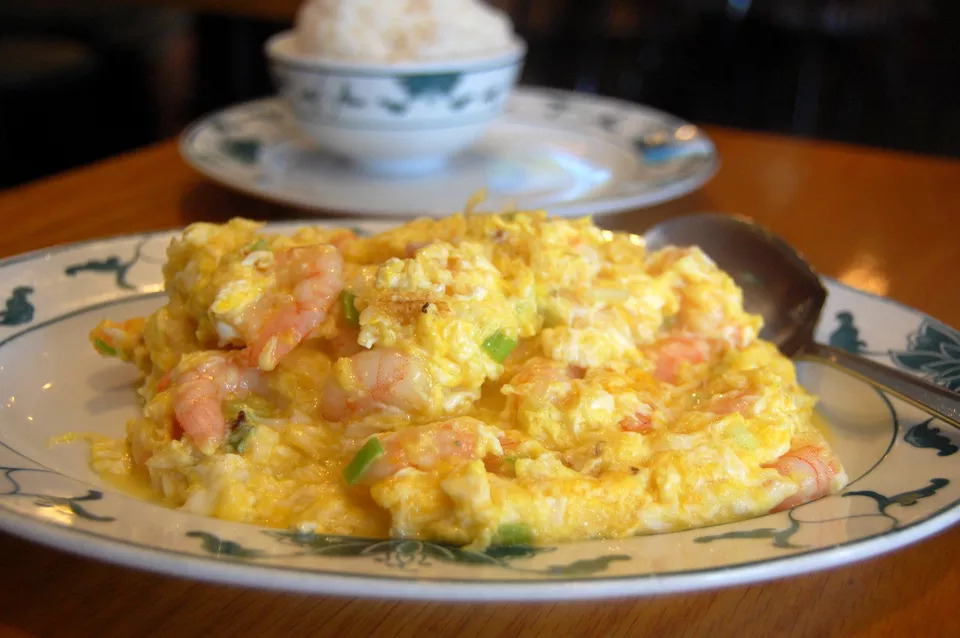
Scrambled Eggs With Shrimp
Total: 10 mins Prep: 5 mins Cook: 5 mins Yield: 2 servings
Ingredients
4 ounces shrimp, peeled and deveined (Note: Cut the shrimp if they are too large.)
4 large eggs, lightly beaten
1/4 cup chicken broth or stock
Up to 1/8 teaspoon salt
Pepper to taste
1/2 teaspoon Chinese rice wine or dry sherry
1 teaspoon oyster sauce
1 green onion, thinly sliced on the diagonal
2 tablespoons oil for frying
Directions
Gather the ingredients. Wash the shrimp and pat dry. Take beaten eggs and stir in the chicken broth, salt, pepper, rice wine, oyster sauce, and green onion.
Add 1 tablespoon oil to a preheated wok or skillet. When the oil is hot, add the shrimp. Stir-fry briefly, until they turn pink. Remove and drain.
Add 1 tablespoon oil and turn the heat on high. When the oil is hot, add the egg mixture. Scramble gently for about 1 minute, then add the shrimp. Continue scrambling until the eggs are almost cooked but still moist. Remove from the heat and let sit for a minute before serving.
Chop Suey With Pork, Shrimp, and Eggs
Chop Suey with Pork_-Shrimp and Eggs
Total: 50 mins Prep: 10 mins Cook: 40 mins Yield: 4 servings
Ingredients
2 to 3 tablespoons cooking oil (as needed)
1 medium onion (peeled and thinly sliced)
1 tablespoon garlic (minced)
1/2 pound/1/4 kilo. pork (cubed)
Salt and pepper (as needed)
1/2 cup water
1/4 kilo. shrimp (8 to 10 medium shrimp, boiled and peeled)
1 dozen quail eggs (boiled and shelled)
1 medium carrot (sliced thinly)
12 pieces of baby corn (sliced diagonally in half)
100 grams of snow peas
1 teaspoon soy sauce
1 tablespoon oyster sauce
1 teaspoon sesame oil
1 teaspoon cornstarch
1 teaspoon sugar
Directions
In a pan, pour the cooking oil, and turn the heat to medium heat.
Saute the garlic and onion.
Add the pork. Sprinkle lightly with salt and pepper. Pan-fry the pork until it is slightly brown.
Add 1/2 cup water, cover, and bring to a boil.
While waiting for the water to boil, prepare the sauce: In a small bowl, combine the soy sauce, oyster sauce, sesame seed oil, cornstarch, and sugar.
When the pork is tender, add the shrimp, then the quail eggs.
Add the carrot and baby corn.
Add the snow peas.
Add the sauce, stirring until it thickens.
Add salt and pepper to taste.
Chinese Steamed Egg
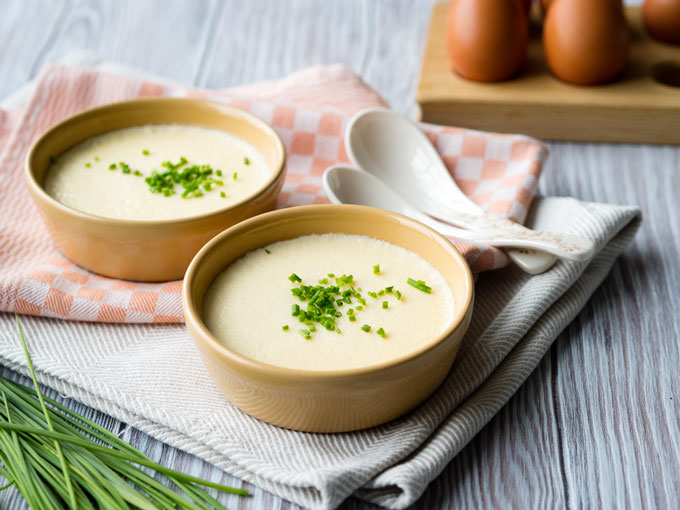
Chinese Steamed Egg
Serves: 2 bowls Prep: 5 mins Cook: 12 mins Total: 17 mins
Ingredients
4 medium eggs
1 1/4 – 1 3/4 cups water, vegetable, or chicken stock (approximately, as it will depend on the volume of your eggs) – lightly warmed
1 pinch salt (optional)
For Topping
chives – finely chopped
sesame oil
soy sauce (use tamari for GF)
hot chili oil
Directions
First, you need to determine how much water or stock you will need. As eggs differ in size, the amount will depend on the volume of the eggs that you use for this recipe. I can give you a guide, but if you want perfect Chinese Steamed Eggs, it’s best if you measured your eggs.
In a medium bowl, lightly beat the eggs together with a fork. Measure out and take note of the volume of the eggs (cups or milliliters). If you have a 2-cup measuring cup, you can beat the eggs directly into the cup to get a measurement. My four eggs totaled 200 milliliters (just under 1 cup).
The amount of water or stock you will want is between 1 1/2 to 2 times the volume of the eggs. So if you have 200 milliliters of egg, you could use between 300 – 400 milliliters of water, depending on your preference. 300 milliliters of water or stock will give you a firmer texture than if you were to use 400 milliliters.
For reference, in the photos, I used 300 milliliters of water.
Make The Chinese Steamed Eggs
Slowly mix the water in with the eggs. Mix in salt if using.
Carefully pour the eggs through a fine-mesh strainer and evenly divide it into two bowls. The strainer will catch any larger pieces of the egg, as well as break apart much of the bubbles or foam that may have formed. If you have the time, allow the egg to sit for a few minutes so any remaining bubbles on the surface pop.
Cover the eggs with aluminum foil. This is to prevent any water droplets from the steamer from falling directly onto the eggs, making the surface of the steamed eggs rough.
Gently place the bowls onto a prepared steamer. Steam over low heat until the eggs are set, about 10-14 minutes, depending on the shape and depth of your bowls. For reference, in the photos, the eggs were steamed for 12 minutes.
Carefully remove from steamer and garnish with desired toppings. Serve warm.
20-Minute Congee with Pork and Thousand Year-Old Egg
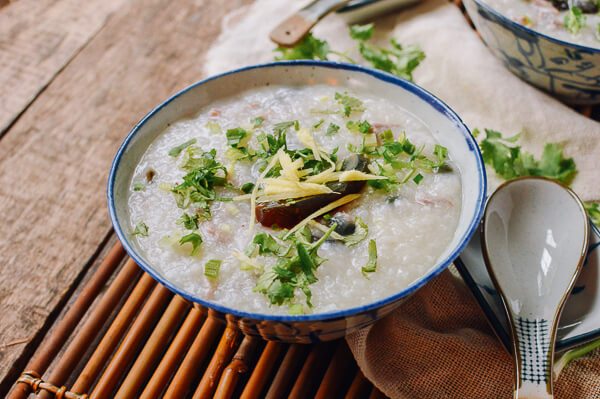
20-Minute Congee with Pork and Thousand Year-Old Egg
Prep Time: 10 mins Cook Time: 20 mins Total Time: 30 mins
Ingredients
¾ cup white rice
4 ounces pork shoulder (115g, julienned)
½ teaspoon cornstarch
1 teaspoon oyster sauce
1 teaspoon vegetable oil
7 cups water (or chicken broth; 1.65 liters)
2 thousand-year-old eggs
3 slices ginger
¼ teaspoon ground white pepper
Salt (to taste)
Chopped scallion and cilantro (to garnish)
Directions
Wash the rice, drain, and transfer to a zip-lock bag or freezer-safe container. Leave it in the freezer for at least 8 hours.
Marinate the pork with the cornstarch, oyster sauce, and vegetable oil for about 15 to 20 minutes.
Meanwhile, in a medium pot, bring 7 cups of water to a boil. Add the frozen rice (no need to defrost) and bring it to a boil again, stirring the rice to prevent sticking. Reduce the heat to a low simmer, and cover and cook for about 15 minutes. Periodically check and stir the congee. It’s important to stir from the bottom to prevent sticking, as the rice texture thickens quickly.
While that’s cooking, dice the thousand-year-old egg and set it aside. Very thinly julienne the ginger. Don’t prepare this ahead of time, as we want the flavor of freshly cut ginger.
After 15 minutes, it’s time to add the julienned ginger, pork, and thousand-year-old egg. Stir and simmer for another 5 minutes or so. Finally, stir in the white pepper and salt to taste. Serve piping hot with chopped scallions and cilantro.
It’s that easy, folks!
Nutrition
Calories: 131kcal | Carbohydrates: 19g | Protein: 6g | Fat: 3g | Saturated Fat: 1g | Cholesterol: 62mg | Sodium: 461mg | Potassium: 93mg | Fiber: 1g | Sugar: 1g | Vitamin A: 170IU | Vitamin C: 0.3mg | Calcium: 23mg | Iron: 0.6mg
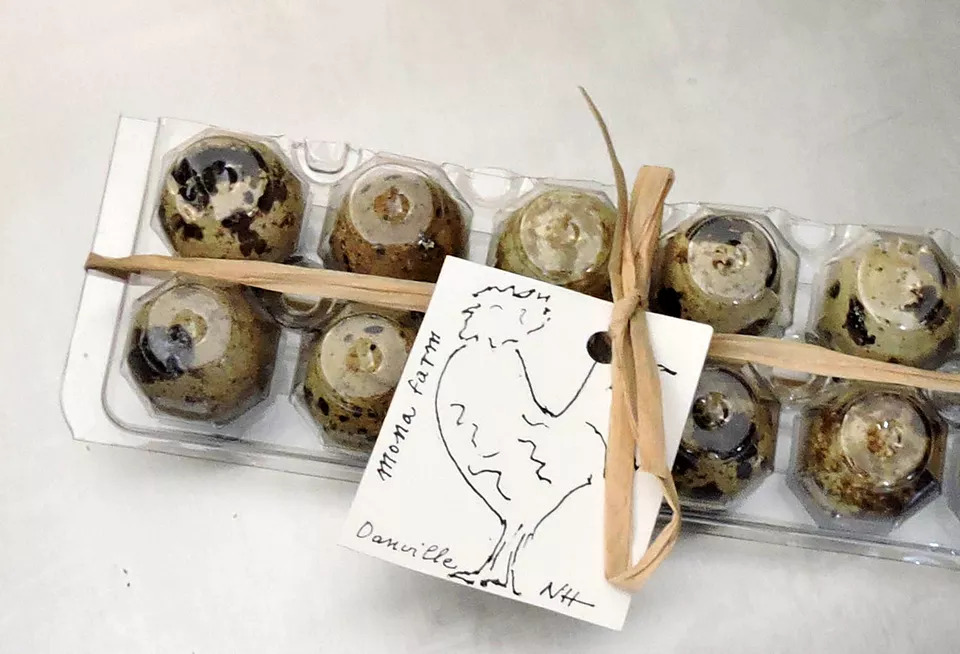
Salted Duck Eggs
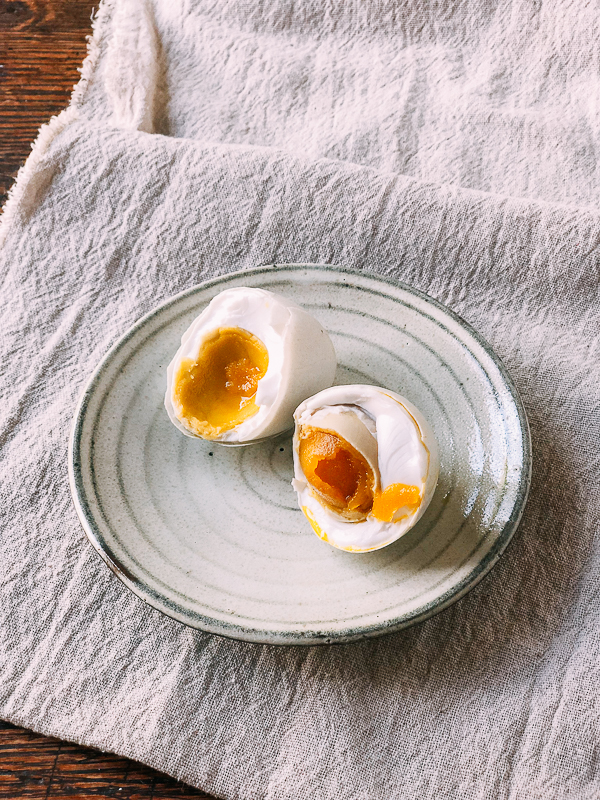
Salted Duck Eggs
Ingredients
12 duck eggs
1-quart water (about 1 L, depending on the size of your container and the size of your eggs)
1/4 cup sea salt (70g)
1/2 cup baijiu (120ml, 55 proof Chinese hard liquor; can substitute whiskey)
Directions
First, wash the eggs in plain water until clean.
Carefully arrange the eggs in the container they’ll be brined in. Add enough water to cover the eggs so they are completely submerged. This step is to find out how much water you need, so do not discard the water.
Carefully remove the eggs from the water, and let them sunbathe for 3-4 hours in the early morning sun; reduce the sunbathing time to 1-2 hours if the temperature is higher than 65F, but it should still be early morning sun! Turn the eggs every hour. The late morning hot sun may result in cracked eggs during the salting process.
Meanwhile, transfer the water in the container to a clean pot—I used about 1 quart of water (if you’re using aromatics, it’s time to add them now!). Stir in ¼ cup salt and bring to a boil. Turn off the heat, cover, and cool completely to room temperature. In the meantime, take the container, and let it dry out completely in the sun.
Pour ½ cup of Chinese baijiu (or whiskey) into a large bowl, carefully take the eggs, and turn them over in the baijiu. ½ cup of baijiu isn’t enough to submerge them, so you’ll have to roll them around every 10 minutes so they are soaking at all times. Soak the eggs in the baijiu for 1 hour.
Once the saltwater is completely cooled and your container is dry, add the eggs back to the glass container one by one. Pour in the baijiu used to soak the eggs along with the cooled saltwater. Arrange the eggs with a clean utensil to make sure they are all completely submerged.
Cover tightly so that the container is thoroughly sealed, and store in a cool, dry place for 30 to 60 days. Egg sizes vary, so brining time will vary as well. You can cook one after 30 days to see if it’s done. Try again in 10-15 days if it’s not quite there! To cook the duck eggs for your morning congee and other uses, submerge the salted duck egg in a pot of water, and cook over medium heat for 10-12 minutes.
Notes
If using free-range chicken eggs, remember to reduce the bringing duration by at least 10 days, because they’re smaller and require less time for the salt to penetrate.
Eggs break easily, so handle them with care during the entire process; any micro-cracks will ruin your salted eggs.
This is a morning recipe. You should only use early morning sun to sunbathe the eggs (yes, the eggs need to sunbathe. Sounds crazy!). This morning’s temperature was around 50-55 degrees F. I left the eggs in the early morning sun for 3-4 hours. If the temperature is higher, reduce the sunbathing time to 1-2 hours.
All utensils or containers must, must be clean and grease-free. Boil your cookware and dishware (glass only) ahead of time if needed. You may also use a heavy-duty, air-tight plastic container.
The saltwater must be boiled, do not use “raw” water.
You can also get fancy by adding a couple of star anise, a stick of cinnamon, and 2 tablespoons of Sichuan peppercorns, but they must be boiled in the saltwater and cooled prior to adding.
The use of Chinese baijiu, a strong clear liquor, is important, as it brings out the natural oils in the egg. Whiskey is a good substitute if you have trouble finding baijiu, which still isn’t that widely available outside of China.
Once the duck eggs reached the ideal state, remove them from the saltwater to avoid them becoming too salty. You can store them in a sealed container in the refrigerator for 1-2 months.
Start testing after 30 days, depending on the egg size. Small eggs take less time.
Steamed Eggs with Crispy Pork
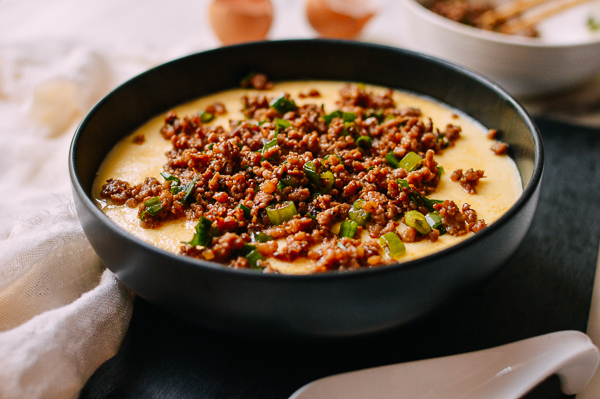
Steamed Eggs with Crispy Pork
Prep Time: 10 mins Cook Time: 20 mins Total Time: 30 mins
Ingredients
For the meat & marinade
4 ounces ground pork (110g, can substitute ground chicken or beef)
1 1/2 teaspoons Shaoxing wine
1 1/2 teaspoons soy sauce
1/2 teaspoon dark soy sauce
1 tablespoon water
1 tablespoon ginger (minced)
1/4 teaspoon sugar
1/2 teaspoon cornstarch
For the egg mixture
3 eggs
water (same volume as eggs)
vegetable or chicken stock (same volume as eggs)
salt (to taste)
1 teaspoon sesame oil
To cook the ground meat
1 tablespoon vegetable oil
1 scallion (finely chopped)
Directions
Marinate the ground meat
Combine the ground meat with all the marinade ingredients. Stir until the meat has absorbed any standing liquid. Marinate for 15-20 minutes while you prepare the egg mixture.
Make the egg mixture
To make the egg mixture, crack 3 eggs into a liquid measuring cup and note the volume. Pour the eggs into a large bowl, add salt, and beat for at least 1 minute.
Measure the same volume of water, and add it to the bowl. Do the same with the stock. Whisk the mixture all together along with 1 teaspoon sesame oil, and make sure everything’s well combined.
Steam the eggs
Place a heat-proof shallow bowl in a steamer over high heat. Be sure any water in your steamer will not be able to bubble up and touch the bowl during the steaming process.
Once boiling, turn the heat down to a simmer. Then, pour the egg mixture into the heated bowl through a fine-mesh strainer.
Cover the steamer, turn up the heat to high, and steam the eggs for 3 minutes. After 3 minutes have elapsed, shut off the heat, but keep the steamer covered. Let stand for 14 minutes with the lid firmly covered. Cook the meat during this time.
Brown the meat
Heat a wok over high heat until it starts to smoke. Add 1 tablespoon oil. Brown the marinated meat over high heat until any liquid has cooked off and the bits of ground meat is crispy. Avoid stirring too much in order to give the meat a chance to brown and crisp.
Add in the chopped scallion, mix well and turn off the heat. Once the steamed eggs are done cooking, remove from the steamer, top with the cooked meat, and serve!
Nutrition
Calories: 179kcal | Carbohydrates: 2g | Protein: 11g | Fat: 14g | Saturated Fat: 6g | Cholesterol: 143mg | Sodium: 423mg | Potassium: 178mg | Fiber: 1g | Sugar: 1g | Vitamin A: 210IU | Vitamin C: 0.6mg | Calcium: 22mg | Iron: 1mg
Egg Drop Soup
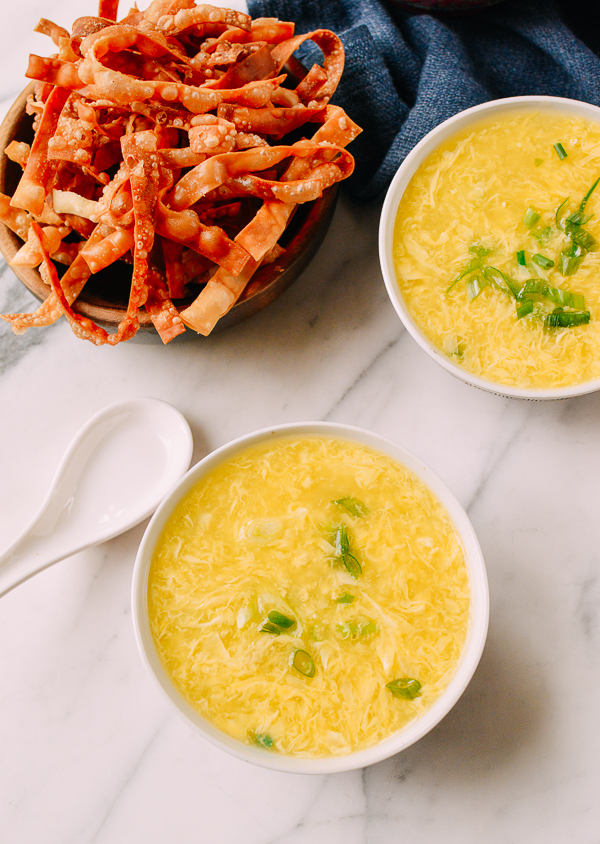
Egg Drop Soup
Prep Time: 5 mins Cook Time: 10 mins Total Time: 15 mins
Ingredients
4 cups chicken stock (about 1 liter, organic or homemade preferred!)
1/2 teaspoon sesame oil
3/4 teaspoon salt
1/8 teaspoon sugar
1/8 teaspoon white pepper
1/2 teaspoon turmeric (Or 5 drops yellow food coloring. Optional, but if you want “the look…”)
3 tablespoons cornstarch (mixed with 1/3 cup water)
3 eggs (lightly beaten)
1 scallion (chopped)
Directions
Bring the chicken stock to a simmer in a medium soup pot. Stir in the sesame oil, salt, sugar, and white pepper. Add in the turmeric or 5 drops of yellow food coloring, if using. This will give the soup that rich restaurant-style yellow color, but it is optional. Taste the soup, and adjust the seasoning if needed.
Next, add the cornstarch and water mixture. Make sure the cornstarch and water are mixed well, as the cornstarch settles very quickly. Stir the soup continuously as you drizzle in the slurry, or you’ll get clumps of cooked starch in your soup. Use more or less starch if you like a thicker or thinner soup. You can also add the starch in a couple of small batches, let the soup simmer for a couple of minutes, then check to see if the consistency is to your liking.
Now we’re ready for the most exciting part: the egg. This recipe calls for the egg to be lightly beaten, which results in both white and yellow egg swirls. The speed at which you stir the soup when adding the egg also determines whether you get large “egg flowers” or small egg flowers (i.e. swirly bits of egg). Use a ladle to stir the soup in a circular motion, and slowly drizzle in the egg until you have added it all.
Ladle the soup into bowls, top with scallions, and serve!
Nutrition
Calories: 109kcal | Carbohydrates: 10g | Protein: 7g | Fat: 4g | Saturated Fat: 1g | Cholesterol: 87mg | Sodium: 551mg | Potassium: 198mg | Fiber: 1g | Sugar: 3g | Vitamin A: 140IU | Vitamin C: 0.7mg | Calcium: 17mg | Iron: 0.8mg
Chinese Tomato Egg Stir-fry
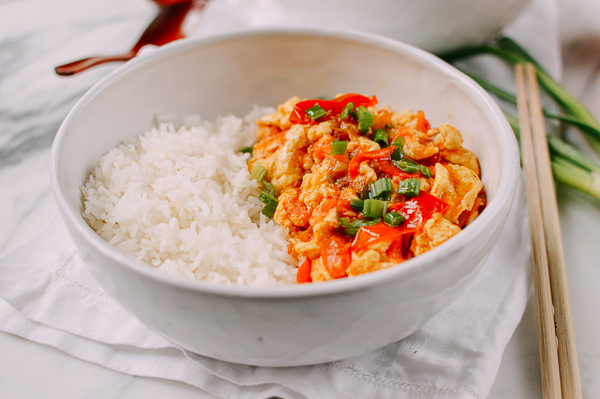
Chinese Tomato Egg Stir-fry
Prep Time: 5 mins Cook Time: 5 mins Total Time: 10 mins
Ingredients
4 small to medium tomatoes (about 500 g, 1 pound)
1 scallion
4 eggs
3/4 tsp salt (divided, or to taste)
1/4 tsp white pepper
1/2 tsp sesame oil
1 tsp Shaoxing wine
3 tbsp vegetable oil (divided)
2 tsp sugar
1/4-1/2 cup water
Directions
Start by cutting tomatoes into small wedges and finely chop the scallion.
Crack 4 eggs into a bowl and season with ¼ teaspoon salt, ¼ teaspoon white pepper, ½ teaspoon sesame oil, and 1 teaspoon Shaoxing wine. Beat eggs for a minute.
Preheat the wok over medium heat until it just starts to smoke. Then add 2 tablespoons of oil and immediately add the eggs. Scramble the eggs and remove them from the work immediately. Set aside.
Add 1 more tablespoon oil to the wok, turn up the heat to high, and add the tomatoes and scallions. Stir-fry for 1 minute, and then add 2 teaspoons sugar, ½ teaspoon salt, and ¼ cup water (if your stove gets very hot and liquid tends to cook off very quickly in your wok, add a little more water). Add the cooked eggs.
Mix everything together, cover the wok, and cook for 1-2 minutes, until the tomatoes are completely softened.
Uncover, and continue to stir-fry over high heat until the sauce thickens to your liking. Serve!
Notes
Feel free to adjust this recipe to suit your tastes!
Nutrition
Calories: 333kcal | Carbohydrates: 6g | Protein: 11g | Fat: 30g | Saturated Fat: 19g | Cholesterol: 327mg | Sodium: 925mg | Potassium: 121mg | Fiber: 1g | Sugar: 5g | Vitamin A: 535IU | Vitamin C: 1.2mg | Calcium: 49mg | Iron: 1.5mg
Chicken Egg Foo Young

Chicken Egg Foo Young
Prep Time: 30 mins Cook Time: 20 mins Total Time: 50 mins
Ingredients
For the pancakes
10 ounces boneless skinless chicken breast or thighs (280g, cut into small cubes)
1 tablespoon water
1 teaspoon soy sauce
2 teaspoons cornstarch (divided)
1 tablespoon vegetable or peanut oil (plus 4-6 cups for frying)
medium onion (about 1 ½ cups diced)
2 cups mung bean sprouts
6 large eggs
¼ teaspoon sesame oil
1 scallion (chopped)
Sesame seeds (optional)
For the gravy
1 tablespoon vegetable or peanut oil
1 tablespoon flour
1/2 teaspoon turmeric
1/2 teaspoon paprika
1/8 teaspoon garlic powder
1/8 teaspoon onion powder
3 cups low sodium chicken stock
2 teaspoons soy sauce
1 tablespoon oyster sauce
1/2 teaspoon sesame oil
1/4 teaspoon white pepper (or to taste)
1/4 cup cornstarch
Salt (to taste)
1/4 cup chicken stock
Directions
Mix the cubed chicken with 1 tablespoon of water until the water is absorbed by the chicken (for more on this technique, check out our Spicy Chicken Stir-fry recipe). Add 1 teaspoon soy sauce and 1 teaspoon cornstarch until well combined, and set aside.
Next, make the gravy. In a medium pot or saucepan, heat 1 tablespoon of oil over medium heat. Add 1 tablespoon of flour to make a roux, and cook for 15-20 seconds. Stir in the turmeric, paprika, garlic powder, and onion powder. Let fry for 15 seconds, and whisk in the chicken stock.
Bring the mixture to a simmer, and add the soy sauce, oyster sauce, sesame oil, and freshly ground white pepper to taste. The gravy should be slightly thickened from the roux. Mix the cornstarch with the ¼ cup of chicken stock or water to make a slurry (i.e. until the cornstarch is completely dissolved), and slowly stir in two-thirds of the mixture. Let cook for 30 seconds. Add more of the cornstarch slurry if necessary, until the gravy is thick enough to coat a spoon. Add salt or more soy sauce to your own taste. Be careful not to over-salt the gravy. Cover and set aside.
Next, sear the chicken. Heat 1 tablespoon of oil in your wok until it just starts to smoke, and add in the marinated chicken cubes. Sear for 1 minute on each side, and then stir-fry for another minute until just cooked through. Transfer back to the marinating bowl, and set aside to cool.
In a wok or deep pot, pre-heat your 6 cups of frying oil to 350F. Use a candy thermometer to check the temperature––too high a temperature will result in burned Egg Foo Young patties, and too low a temperature will give you greasy patties or will make your patties fall apart!
Meanwhile, place the cooled chicken, diced onion, and bean sprouts into a mixing bowl. Add the eggs, sesame oil, and second teaspoon of cornstarch. Do not add any salt or seasonings to this mixture, or your Egg Foo Young patties may not hold together when frying!
Use a large soup ladle or Hoak (a Chinese ladle that’s often used together with a Chinese spatula) to fold the mixture together until just combined. The eggs should look like they are slightly beaten and only just mixed with the rest of the ingredients. If you over-mix the eggs, the whole mixture will become too watery and will not form a patty during frying.
Using your ladle, work quickly to slowly drop three separate scoops of the mixture into the wok for the first batch (you can also work in batches of 2 if your wok is smaller). Each scoop should be about 3/4 cup of the mixture. The correct technique is to tilt your ladle close to the oil and pour the mixture starting from the edge where the oil meets the wok. Pour it slowly so the ladle barely touches the oil. Don’t let the egg cook while it’s in the ladle, or it will stick to the ladle, and you won’t have a smooth drop for the next Egg Foo Young patty.
Let the patties fry for about 40 seconds. You can also use your wok spatula to gently flip some hot oil on top of the uncooked patty to speed the cooking time. When each patty is solid and turning golden brown, use your wok spatula to turn them over in the same order that you dropped them into the oil.
After another 60 seconds, scoop each patty onto a mesh strainer, giving it a few gentle taps to remove excess oil. Place each patty on a wire rack over a sheet pan to drain until all of your patties are cooked.
Transfer the Egg Foo Young patties from the cooling rack to a serving plate (ideally these are served individually, rather than on a big family-style platter), pour the gravy over the top, add a sprinkling of scallions and toasted sesame seeds, and serve with additional gravy on the side.
Notes
This recipe makes 6 small egg foo young pancakes.
Nutrition
Calories: 420kcal | Carbohydrates: 20g | Protein: 28g | Fat: 26g | Saturated Fat: 11g | Cholesterol: 299mg | Sodium: 455mg | Potassium: 508mg | Fiber: 2g | Sugar: 4g | Vitamin A: 609IU | Vitamin C: 11mg | Calcium: 65mg | Iron: 3mg
Weeknight “Slop” (Rice with Spicy Bamboo Shoots, Eggs, & Avocado)
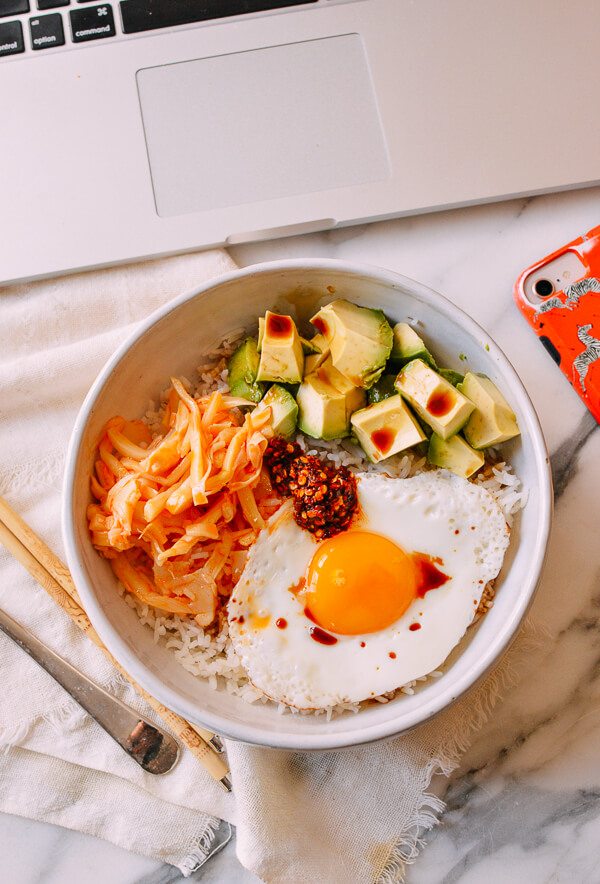
Weeknight Slop (Rice with Spicy Bamboo Shoots, Eggs, & Avocado)
Prep Time: 5 mins Cook Time: 5 mins Total Time: 10 mins
Ingredients
1 1/2 cups cooked rice
1 fried egg (to your liking)
½ avocado
A wad of preserved chili bamboo shoots (you heard me)
A dollop of chili oil (or Chiu chow oil, to taste)
A drizzle of soy sauce
A pinch of ground white pepper (optional)
Directions
Make rice. Put it in a bowl. One that is easily held while sitting in front of the TV or huddled over your computer.
Fry the egg–to your liking! Scrambled or hard-boiled will do just fine too.
While the egg is cooking, grab the avocado. Halve it, seed it, and cut it up. Or just scoop it out over the rice.
Add your preferred concentration of chili bamboo shoots.
Fetch your preferred spicy chili oil or Chiu chow oil from the fridge. Add in a scoop of that to taste.
Drizzle the soy sauce over the whole thing. Add a pinch of white pepper.
Mix and enjoy!
Nutrition
Calories: 622kcal | Carbohydrates: 78g | Protein: 16g | Fat: 28g | Saturated Fat: 5g | Cholesterol: 164mg | Sodium: 747mg | Potassium: 679mg | Fiber: 9g | Sugar: 2g | Vitamin A: 385IU | Vitamin C: 10.1mg | Calcium: 60mg | Iron: 2.3mg
Egg Dumplings, A Chinese New Year Must Have
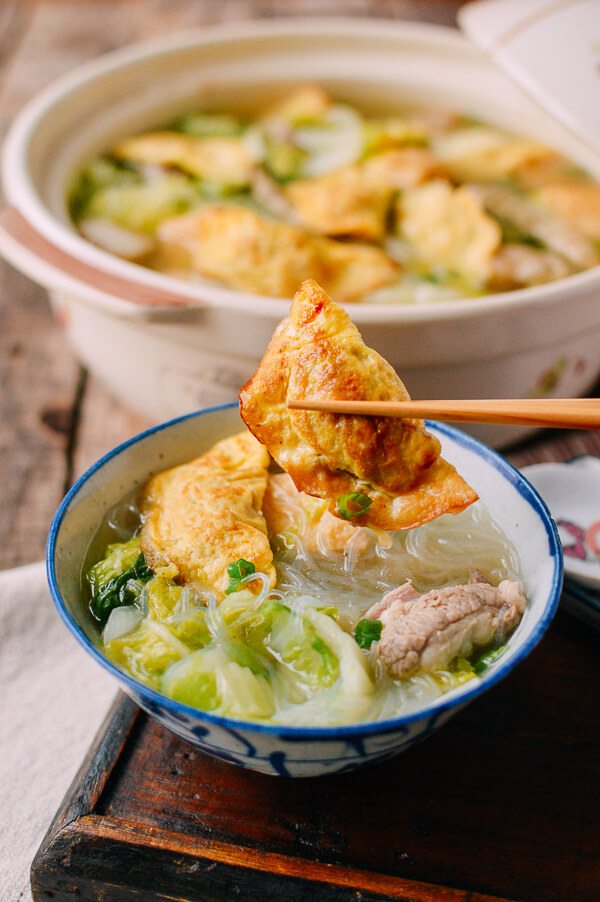
Egg Dumplings, A Chinese New Year Must Have
Prep Time: 20 mins Cook Time: 40 mins Total Time: 1 hr
Ingredients
5 large eggs
8 ounces ground pork (or chicken)
2 tablespoons Shaoxing wine
2 tablespoons light soy sauce
½ teaspoon sesame oil
¼ teaspoon ground white pepper
2 tablespoons water
2 tablespoons scallion (minced)
1 teaspoon ginger (minced, plus one additional thin slice of ginger)
A large round stainless steel soup ladle
Some vegetable oil and a pastry brush
Directions
In a large bowl, beat 5 eggs for a good 2 minutes. Set aside next to the stove.
In a separate bowl, mix the ground meat with the Shaoxing wine, light soy sauce, sesame oil, ground white pepper, water, minced scallion, and minced ginger. Whip everything in one direction for at least 3 minutes, until the filling is well combined and starts to take on a sticky texture. Set aside along with the egg.
Pour a small amount of oil in a bowl, and grab a pastry brush. Set it alongside the egg and meat filling so everything is easily within reach.
Now, turn your stove on to medium heat. Hold the ladle over the open flame (if you have an electric stove, it will be tricky to maintain even heat), and with the help of a pair of chopsticks, rub the ginger inside the ladle all over using quick motions for a good two minutes or so. This step treats the ladle, so the egg will not stick to it. I’m not sure why it works, but it does! If the egg still sticks to the ladle, repeat this process one more time.
Once the ladle has been treated, brush the inside with some oil, pouring any excess oil back into the bowl. Add 1 tablespoon of the egg mixture, and immediately turn the ladle in a circular motion to spread the egg mixture into a circle about 3 inches in diameter. Add 1 teaspoon of the meat filling on one side of the circle, and use the chopsticks to ease the other half of the circle off of the ladle, folding it over to create a half-moon shape. Gently tap the edges closed so the inner raw egg seals the dumpling shut. That’s one! Repeat until you’ve used up all your egg and meat filling. This recipe makes 3 dozen egg dumplings.
Notes
This recipe makes 3 dozen (10 servings of three dumplings each).
Nutrition
Calories: 83kcal | Carbohydrates: 1g | Protein: 6g | Fat: 6g | Saturated Fat: 2g | Cholesterol: 82mg | Sodium: 205mg | Potassium: 86mg | Fiber: 1g | Sugar: 1g | Vitamin A: 110IU | Vitamin C: 0.3mg | Calcium: 13mg | Iron: 0.6mg
Salted Chili & Chinese Chive Frittata

Salted Chili & Chinese Chive Frittata
Prep Time: 10 mins Cook Time: 10 mins Total Time: 20 mins
Ingredients
6 large eggs
⅛ teaspoon sugar
1 teaspoon Shaoxing wine
¼ teaspoon ground white pepper
¼ teaspoon sesame oil
5 tablespoons vegetable oil
1½ cups Chinese chives (chopped)
¼ cup Hunan chili peppers (or to taste––they are quite salty!)
Directions
First, beat the eggs, sugar, Shaoxing wine, white pepper, and sesame oil in a bowl. Heat a skillet (cast iron or non-stick works best) over medium-high heat with 5 tablespoons of oil.
Add the chives, and stir-fry until just wilted. Add the human chilies and distribute them evenly.
Pour the eggs evenly over the mixture. If you’d like to just scramble the eggs, gently stir them until they’re just cooked, being careful not to break up the eggs too much.
If you are making a frittata, lower the heat to medium, and let the egg cook until mostly solidified. When you are ready to flip the frittata, carefully slide it onto a plate, place the pan over the plate, and quickly flip the whole thing so the frittata flips out into the pan. Continue to cook until there’s no more runny egg, and serve! It’s a little tricky, but if you want that wow factor, say a prayer, and go for it!
Nutrition
Calories: 272kcal | Carbohydrates: 5g | Protein: 9g | Fat: 24g | Saturated Fat: 16g | Cholesterol: 246mg | Sodium: 594mg | Potassium: 135mg | Fiber: 1g | Sugar: 3g | Vitamin A: 1010IU | Vitamin C: 8.7mg | Calcium: 51mg | Iron: 1.4mg
Chinese Chives & Eggs Stir Fry
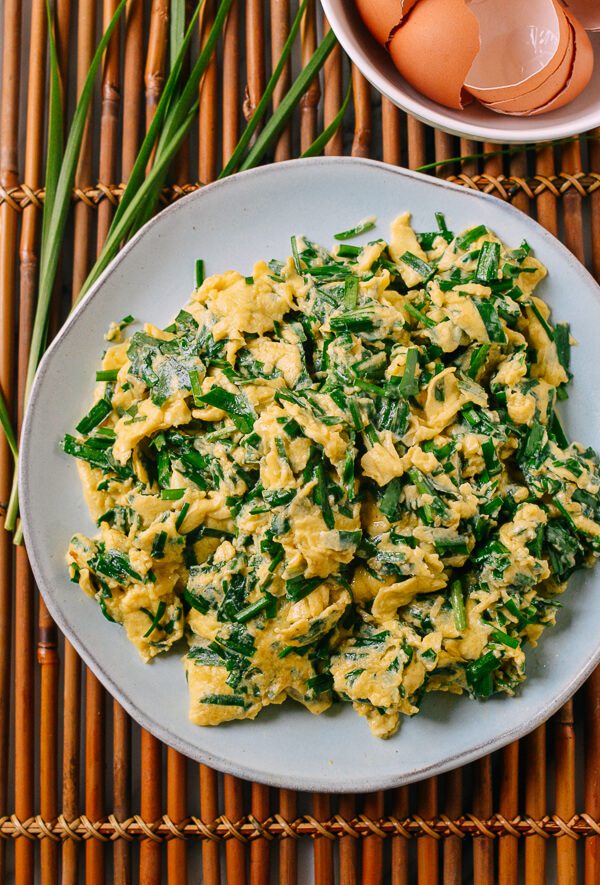
Chinese Chives & Eggs Stir Fry
Prep Time: 10 mins Cook Time: 5 mins Total Time: 15 mins
Ingredients
5 large eggs
1/8 teaspoon sugar
1/2 teaspoon salt
1 teaspoon Shaoxing wine
1/4 teaspoon ground white pepper
1/4 teaspoon sesame oil
4 teaspoons water
2 cups Chinese chives/garlic chives (chopped)
4 tablespoons vegetable oil
Directions
Crack the eggs into a large bowl, and add the sugar, salt, Shaoxing wine, white pepper, sesame oil, and water. Beat the eggs for a good 30 seconds until you see a layer of small bubbles floating on the surface of the beaten eggs. Mix in the chives until combined. Now you are ready to cook.
Heat a wok until it just starts to smoke, and then turn the heat down to medium-low. Wait 10 seconds, and then add the oil. Coat the wok with oil using your spatula to swirl it around. The oil should be hot but not smoking when you add the egg mixture.
Once you pour the eggs into the wok, flip and stir them slowly with a spatula, being careful not to let the eggs brown or firm up too much. Once the eggs are just cooked, they’re ready. Serve!
Nutrition
Calories: 420kcal | Carbohydrates: 3g | Protein: 15g | Fat: 39g | Saturated Fat: 26g | Cholesterol: 409mg | Sodium: 739mg | Potassium: 270mg | Fiber: 1g | Sugar: 1g | Vitamin A: 2335IU | Vitamin C: 23.3mg | Calcium: 98mg | Iron: 2.6mg
Oyakodon (Japanese Chicken & Egg Rice Bowls)

Oyakodon (Japanese Chicken & Egg Rice Bowls)
Prep Time: 5 mins Cook Time: 25 mins Total Time: 30 mins
Ingredients
⅔ cup dashi stock
1 tablespoon soy sauce
1 tablespoon mirin
1 teaspoon sugar
1 pound boneless skinless chicken thighs (450g, cut into bite-sized pieces)
1 medium onion (thinly sliced)
2 large eggs (beaten)
2 1/2 cups Steamed medium grain rice
1 scallion (chopped)
Directions
In a non-stick frying pan or cast-iron skillet over medium-high heat, add the dashi stock, soy sauce, mirin, and sugar. Bring to a boil.
Add the chicken, and simmer in the stock for 10 minutes. Spread the sliced onion over the chicken and cook for 2 minutes.
Pour the beaten egg over the top, and simmer, covered for 2-3 minutes, until cooked but slightly runny.
Serve over freshly steamed rice and garnish with chopped scallions.
Nutrition
Calories: 435kcal | Carbohydrates: 45g | Protein: 39g | Fat: 10g | Saturated Fat: 3g | Cholesterol: 253mg | Sodium: 731mg | Potassium: 570mg | Fiber: 1g | Sugar: 5g | Vitamin A: 235IU | Vitamin C: 3.5mg | Calcium: 68mg | Iron: 2.3mg
Ji Dan Bing: The Chinese Breakfast of Champions
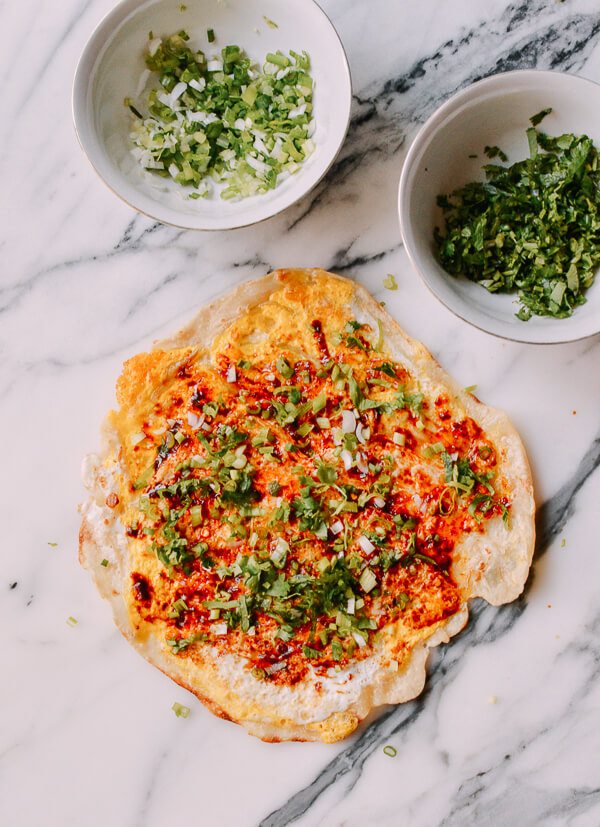
Ji Dan Bing: The Chinese Breakfast of Champions
Prep Time: 1 hr 15 mins Cook Time: 10 mins Total Time: 1 hr 25 mins
Ingredients
1¼ cups all-purpose flour (170 grams)
1/8 teaspoon salt
½ cup of warm water
vegetable oil
4 eggs
Sweet bean sauce (Tian Mian Jiang)
Hot chili bean sauce (Dou Ban Jiang)
Hot chili oil
Toasted sesame seeds
2 scallions (finely chopped)
1 handful cilantro (finely chopped, optional)
4 leaves romaine lettuce (washed and dried)
Directions
Mix together the flour, salt, and ½ cup of warm water with a rubber spatula until a sticky dough forms–about 2-3 minutes. The dough should be sticky, but should also come together in a ball. Coat the dough with 1 teaspoon of vegetable oil and cover with plastic wrap so it is completely sealed. Allow resting for 1 hour.
After the dough has rested, ready the other ingredients–this will be the filling of the Ji Dan Bing. Next, divide the dough into four equal portions, drizzling additional vegetable oil on the dough and your hands to prevent it from sticking. The dough will be less sticky after resting, but it should still be quite moist.
Next, lightly coat your rolling surface and rolling pin with oil, but if you feel things sticking. Most street vendors use a stainless steel surface as you see in the video, but a marble or granite countertop or wooden cutting board will also work nicely.
Use a standard non-tapered rolling pin for this recipe, and roll the dough out into a thin layer until it is almost translucent.
Heat a large skillet or frying pan over medium-high heat. Add 1 teaspoon of oil, which should thin out and spread out easily on the skillet when it is added. The skillet should not be smoking, however!
Lift the rolled out dough in one steady motion and place it in the pan, doing your best to lay it down in one even layer. The dough should sizzle in the skillet to indicate that your pan is hot enough.
Immediately crack one egg in the center of the dough. Lightly beat the egg with a few strokes using a fork or your spatula, spreading it across the dough. There is no need to meticulously try to cover the entire area of the dough and don’t worry if the egg overflows either. The dough and egg will become one!
Drizzle another teaspoon of oil on top of your Ji Dan Bing. Flip it, and let the egg side cook for about 10 seconds, then flip it again. Let the Ji Dan Bing cook for another minute, or until parts of it are golden brown, and transfer to a cutting board or plate, egg side up.
Spread any combination of the sweet bean, hot bean sauce, and hot chili oil on the Ji Dan Bing. Sprinkle toasted sesame seeds on top, along with scallions and cilantro–if using. Place a large leaf of romaine lettuce on top, roll up the pancake, and enjoy while it’s piping hot!
Lotus Mooncakes with Salted Egg Yolks
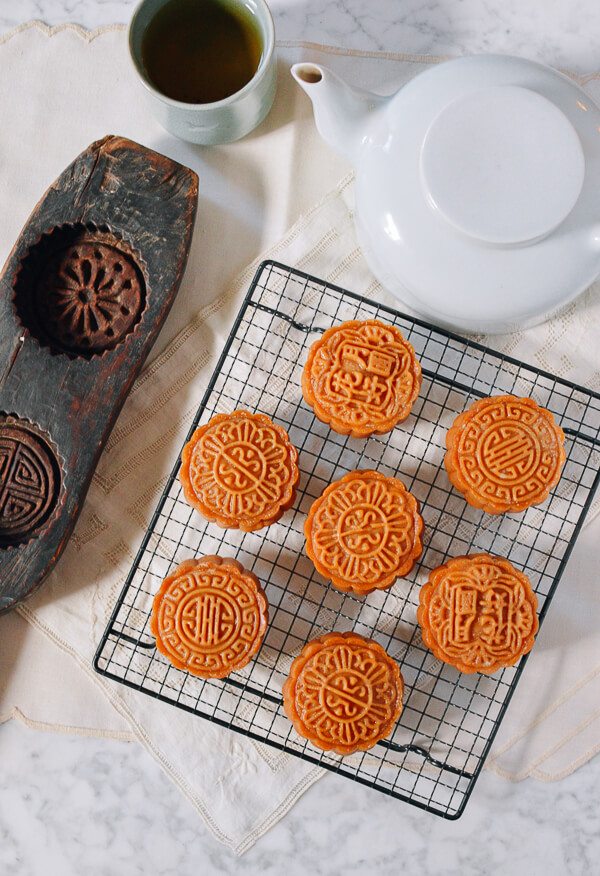
Lotus Mooncakes with Salted Egg Yolks
Prep Time: 12 hrs Cook Time: 2 hrs Total Time: 14 hrs
Ingredients
Part I: The Syrup
8 ounces granulated sugar (1 cup plus 2 tablespoons, 225g)
½ cup water (120 ml)
Juice of ½ a lemon
Part II: The Lotus Filling
12 ounces dried lotus seeds (340g, pre-halved is ideal if you can find it; we used whole)
4 cups water (950 ml)
1⅔ cups powdered sugar (210g, aka icing sugar or confectioner’s sugar)
1¼ cups of peanut oil or corn oil (300 ml)
Part III: the Salted Duck Egg Yolk (it must be salted)
12 salted duck egg yolks
Part IV: The Dough
140 ml of sugar syrup that you made or bought
⅓ cup peanut oil or corn oil (80 ml)
1 teaspoon lye water (available at your Chinese grocery store)
1 ⅔ cups flour (about 250g, plus more for dusting)
Parts V & VI: Assembling and Baking the Mooncakes
1 egg yolk
3 tablespoons water
Directions
Making the Syrup: Heat the sugar and water in a saucepan over medium heat. Stir to dissolve the sugar. Once it’s boiled, add the lemon juice, stir, and immediately turn the heat down to low. Keep the lid off, and let the syrup simmer for about 60 to 70 minutes until the sugary liquid turns a light amber color. Do not stir during this time frame! By now, the liquid might look too watery, but it will thicken once it’s cooled. Try not to overcook it, because it will become thick like caramel (it should be the consistency of honey). Just in case you do overcook the syrup, and it’s too thick, add a few drops of hot water to thin it out. Keep adding the hot water until you get the right consistency. Now pour the sugary liquid into a heatproof container, and let it cool completely before storing it in the refrigerator.
Making the Lotus Paste: Using a butter knife, gently split the lotus seeds in half through the top opening. Remove and discard the green center. Wash and soak them overnight. The next day, wash and drain the lotus seeds. In a pot, add the lotus seeds and 4 cups of water (the water level should be above the lotus seeds). Bring the mixture to a boil over high heat. Once the water reaches a boil, turn the heat to low, and let the seeds simmer for 30 minutes. It’s done once the lotus seeds are softened but have maintained their shape. Turn off the heat, let cool, and then drain the liquid. In a food processor, puree the cooked lotus seeds (it’s best to do this in two batches). Transfer the lotus puree to a non-stick pan (or a cast-iron pan, or a pan with a thick bottom to avoid sticking and burning). Turn the heat to medium-low, and stir/flip/turn the puree using a rubber spatula non-stop for about 30 minutes (nice to have the TV or an audiobook on as you’re doing this). In between, add in the powdered sugar and oil in 3 alternating batches. With each batch, make sure the sugar and oil are well incorporated before adding more. The lotus filling is done once the lotus paste is slightly firmer/can hold its shape. Let it cool completely before storing in the refrigerator in an airtight container. You can make this one day ahead of time, and I found that it’s easier to work with when the filling has been chilled.
Making the salted duck egg yolks: There are a couple of ways to go about preparing the salted duck egg yolk: The ones I bought are already cooked, so they were ready to use, and you can buy the same. But I did find them to be slightly drier than I would normally like. You can also buy whole cooked salted duck eggs, and extract the whole yolk. You can buy raw salted duck eggs, crack the eggs open, and take out the yolks. Preheat the oven to 350 degrees. Dip each yolk in baijiu (a clear Chinese liquor made from grain), just briefly to coat it, then put the egg yolks on a baking sheet lined with parchment paper. Bake for 8 minutes, let them cool completely, and they are ready to use. You can also prepare this ahead of time…just make sure to store them in an airtight container and in the fridge.
Making the dough: First mix the sugar syrup, oil, and lye water together. Then add the mixture to the flour, and use a rubber spatula to fold and combine everything into a soft dough. Do not overwork the dough–this step should only take about a minute or two. Cover the dough in an airtight container or wrap in plastic wrap. Let it rest in the refrigerator for an hour. Chilled dough is much easier to work with. (Side note: you may also leave the dough in the refrigerator overnight if you’d like to make it ahead of time.)
Assembling the mooncakes: While the dough is resting, let’s start assembling the filling. My mooncake mold was marked 100 grams, which means each mooncake should weigh about 100 grams after assembly. This recipe makes 18 mooncakes total: 12 mooncakes with salted duck egg yolks and 6 mooncakes without. Separately weigh out twelve 58-gram scoops of lotus filling and six 70-gram scoops of lotus filling. Shape each portion of filling into balls. Next, take one of the 58-gram lotus balls, make a deep well in the middle, and insert one salted duck egg yolk into the middle. Then close the top and re-shape it into a ball. Repeat for the remaining 11 pieces. It’s good to separate the “with” and the “without.” It’s also a good idea to put them back into the refrigerator, covered until you are ready to assemble the rest of the mooncakes. Once the dough has finished resting, it’s time to prepare the mooncake mold. My mooncake mold came with four pattern plates––one plate should be attached to the mold itself. Wrap another one with clear plastic, because we will use it to press the mooncake from the bottom;, Now dust the inside of the mold with plenty of flour and shake off the excess. You’ll need to repeat this process before pressing every mooncake to avoid sticking. Divide and weigh the dough into eighteen 25-gram pieces, plus 1 smaller dough ball for scraps/mending, which I will get to. Shape each piece into a ball. Lightly dust the dough balls with flour. Take one dough ball and roll it out on a lightly floured surface into a 4-inch round. Put one piece of filling in the center. Carefully lift it up and turn it upside down, and gently press out the air bubbles around the lotus ball, without breaking the dough. Now turn the opening facing up, and slowly press the dough together to close the opening, keeping the distribution of the dough as even as possible. The dough feels like Play-doh, so it’s easy to break, but it’s also easy to squish back together. These instructions might sound confusing, but follow along with the pictures and keep in mind that the chief goal here is to close the dough around the filling without capturing air inside. Now lightly dust the assembled ball with additional flour. Place it inside the mooncake mold with the mold opening facing up. Now press in the bottom piece (with the clear plastic-wrapped plate that you prepared). With some pressure, gently press it inward. Quickly set the mold down, and press the mooncake out with the top pressure bar. The bottom piece will come out no problem, but use your other hand to Very Gently guide the mooncake out of the mold. When and if a small piece of dough gets stuck and does not come out, get a small piece of the “scrap”/“mending” dough to patch up the area. Then clean the mold and dust it well with flour again. Then gently flatten all sides of the mooncake to make it smaller, so it can go back in the mooncake mold for re-shaping. Use slightly more flour for dusting if this becomes a persistent issue. Place the mooncakes on a baking sheet as you make them.
Baking the mooncakes: Preheat the oven to 325 degrees when you are almost finished assembling the mooncakes. Once the oven is preheated, gently mist the mooncakes with a food-grade spray bottle (if you have one) filled with water. But since I didn’t have one, I just used my fingers, and it worked fine! Dip your fingers into a bowl of water, and fling the water on your fingers onto the mooncakes a couple of times. This prevents the dough from cracking. Then, immediately put the mooncakes in the oven and bake for 5 minutes. (Remember to set the timer!) Now prepare the egg wash by whisking the egg yolk and water together. After the mooncakes have been baking for 5 minutes, take them out of the oven and immediately lower the oven temperature to 300 degrees. Now lightly brush each mooncake with egg wash, and put them back in the oven. Bake them for another 15 minutes and remember to set the timer. When the time has elapsed, take them out and let them cool completely.
When the mooncakes first come out of the oven, the dough looks dry like bread, and not oily like what you are used to when opening packaged mooncakes. This is normal. Store the cooled mooncakes in an airtight container for a day or two, and the outside will get that nice shiny sheen that you recognize and love.
After this last step, any uneaten mooncakes can be kept in the refrigerator for a week or two.
Notes
Makes 18 mooncakes (12 with egg yolks, 6 without).
Nutrition
Calories: 308kcal | Carbohydrates: 51g | Protein: 6g | Fat: 9g | Saturated Fat: 2g | Cholesterol: 141mg | Sodium: 16mg | Potassium: 289mg | Fiber: 1g | Sugar: 29g | Vitamin A: 195IU | Vitamin C: 0.2mg | Calcium: 52mg | Iron: 1.8mg